
Happy day.. happy dancing.. today I get to share with you yet another person I met because of quilting.. Mandy of Yellow House Quilts is one rocking BadAss quilter and she has even dived into making some fantastic clothing and is going to give us a sneak peak into that process today! Some of you might know Mandy from her quilts that hang in my store SPOOL.. if so you know she is one cool quilter and if you are looking for someone to add the BadAss touch to your next project makes sure to keep her in mind since she works with clients all over the United States!
************************************************************************
Hello, I am Mandy Applebee from Yellow House Quilts in Upstate NY. I am a longarm quilter by trade and today I am a guest blogger here to talk about garment making from a quilters viewpoint…….
Anyone who knows me knows I say this ALL the time!! I make flat things, like QUILTS, I am NOT a garment or a bag sewist……. I just make flat things. It is actually a joke around my quilty friends. The thought of making a bag puts me in a cold sweat and I have been known to hyper-ventilate at the thought of a zipper…….Why are we even talking about this you ask….. well it turns out, I really like to be able to custom design my own clothes using all the AMAZING fabrics we have available to us in the quilting industry. But I still only sew FLAT things…..
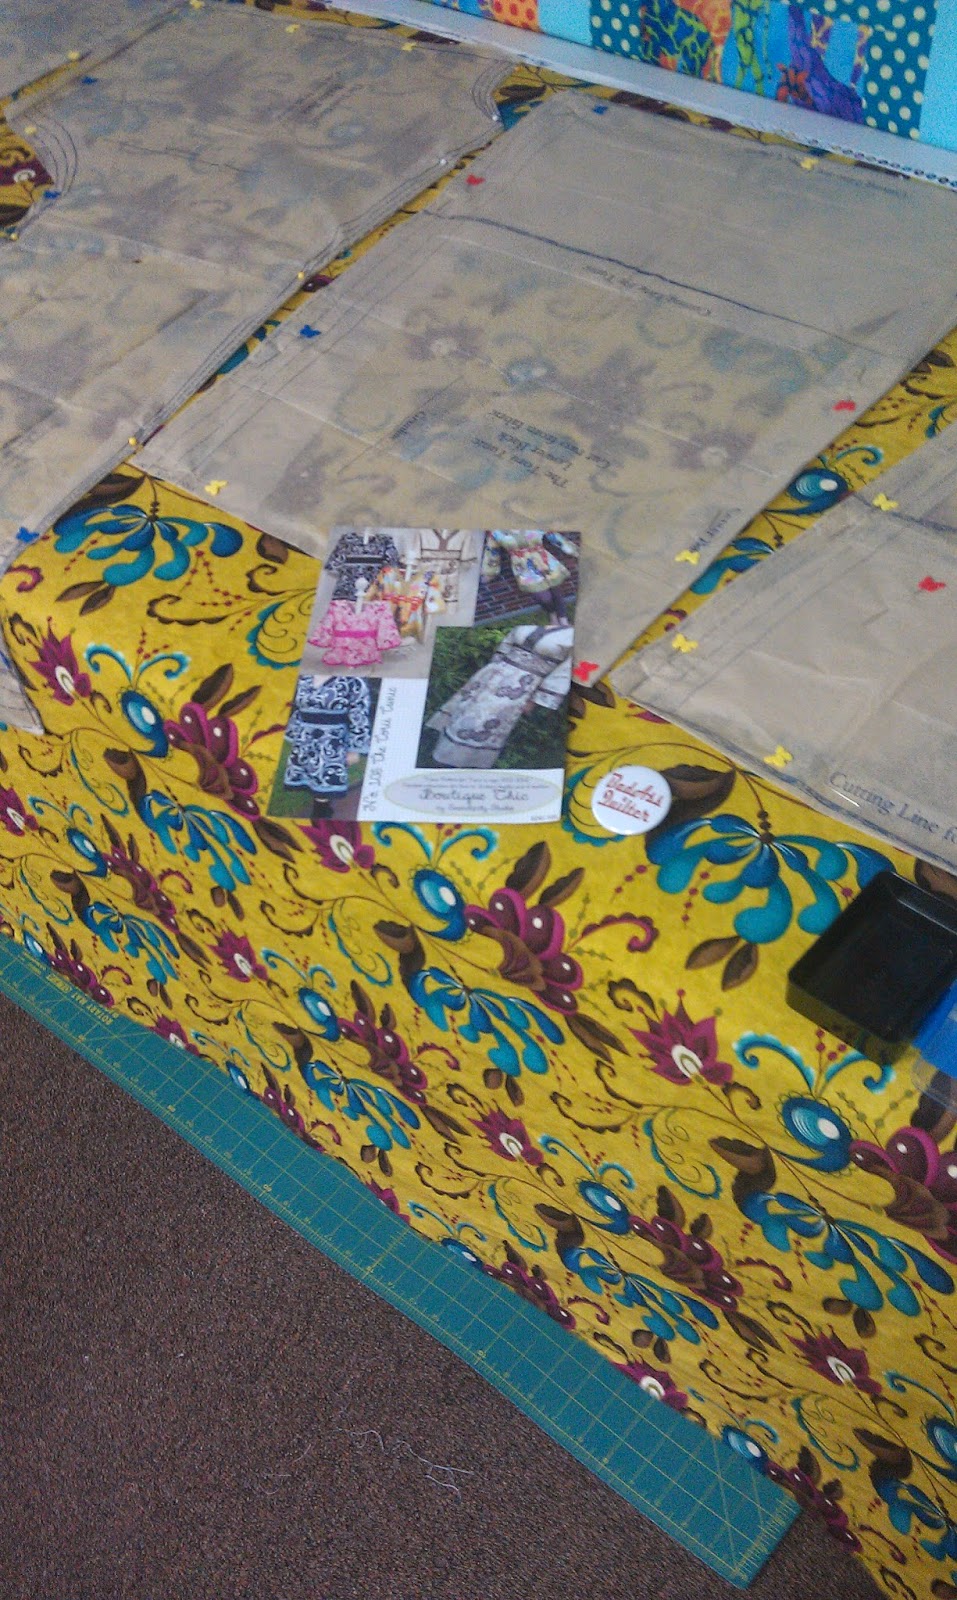
My sweet Friend Maddie Kertay over at Spool (ever heard of her, LOL) tempted me last fall with a pattern for a tunic I REALLY wanted to try. http://www.spoolquilt.com/shop/Patterns/Serendipity-Studio/p/The-Tori-Tunic-x1970187.htm I bought the pattern knowing that I had a retreat coming up with my mom and she could help me tackle this project……. (my mom was a seamstress first, then a quilter, she made my wedding dress for me). I did make the tunic,it is adorable but I needed TONS of help, LOTS of reassurance and a healthy amount of alcohol to keep me calm……. I do NOT sew garments was my decision.
|
trying to figure out if I have the courage to do this……. |
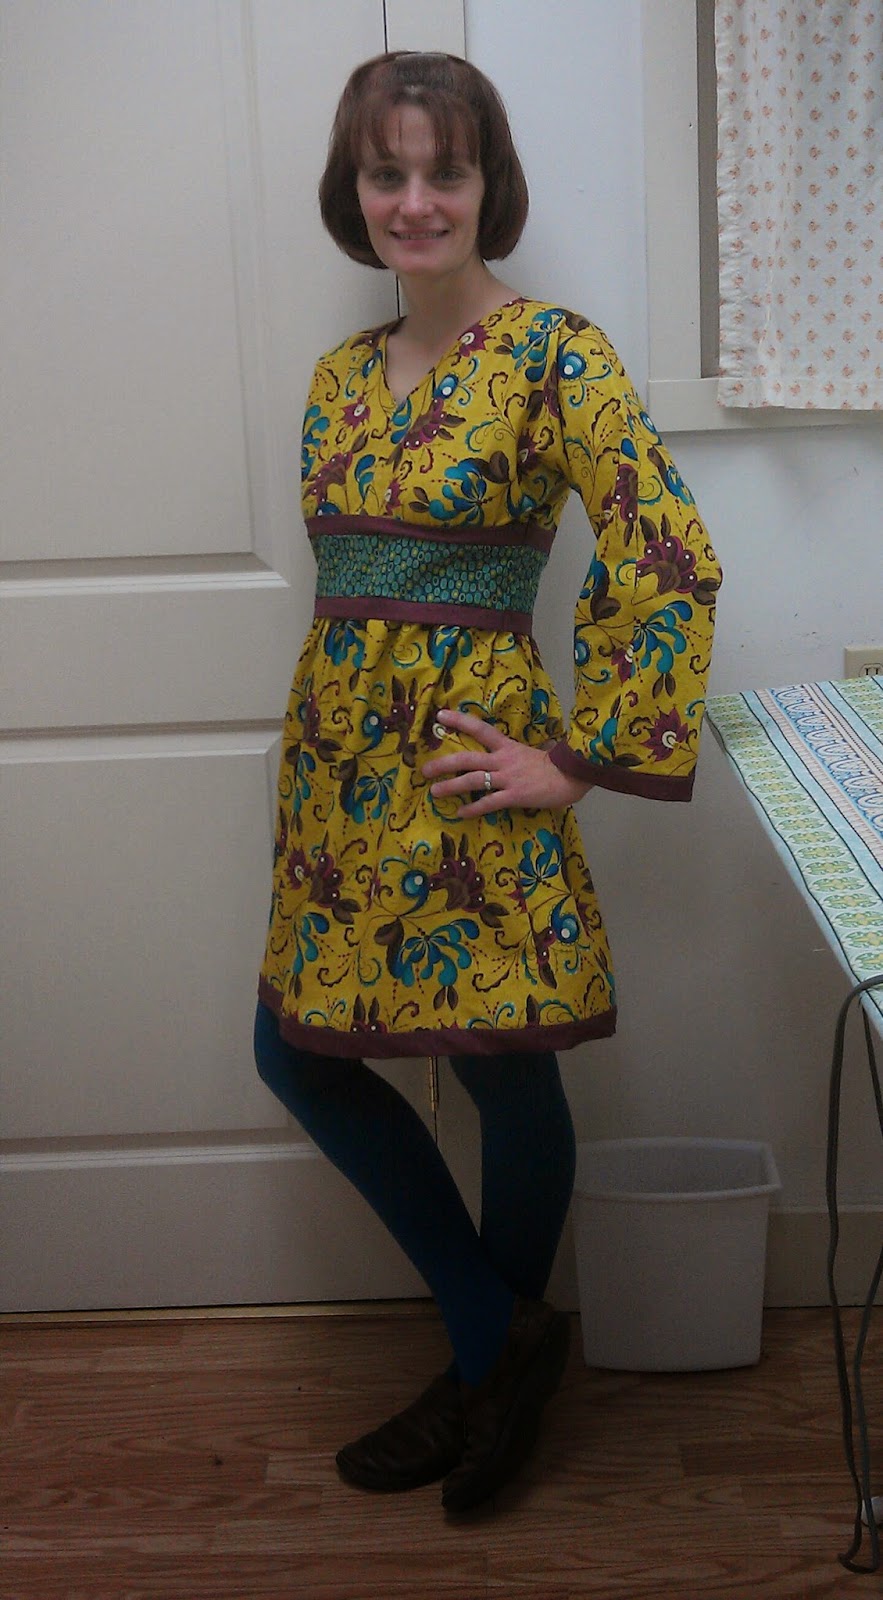
| the FINISHED tunic (which I LOVE) |
I used this same answer anytime someone asked me about making something like a Halloween costume or a purse……. I only make FLAT things. Then I went to International Quilt Market……..
 I met the beautiful Maddie Kertay in person after 2+ years as facebook friends and I discovered that there are SOOO many beautiful patterns for garments available now…… go here to see the ones Spool has available.http://www.spoolquilt.com/shop/Patterns.htm.
My traveling partners and I talked about a really simple tunic for summer that was actually the bathingsuit cover of one of the crew. She set out to create a pattern for this tunic and yet again I realized I was going to have to try making ANOTHER garment. This Square Tunic really IS simple and is FLAT too so I felt like I could tackle it myself, without any moral support from Mom. ( I will give you the pattern at the end….)
I chose some fabrics perfect for summer and jumped right in. As it turns out I can sew garments by myself but I really MUST confess this hardly counts as a typical garment. A beginner can make this one I promise you that!! 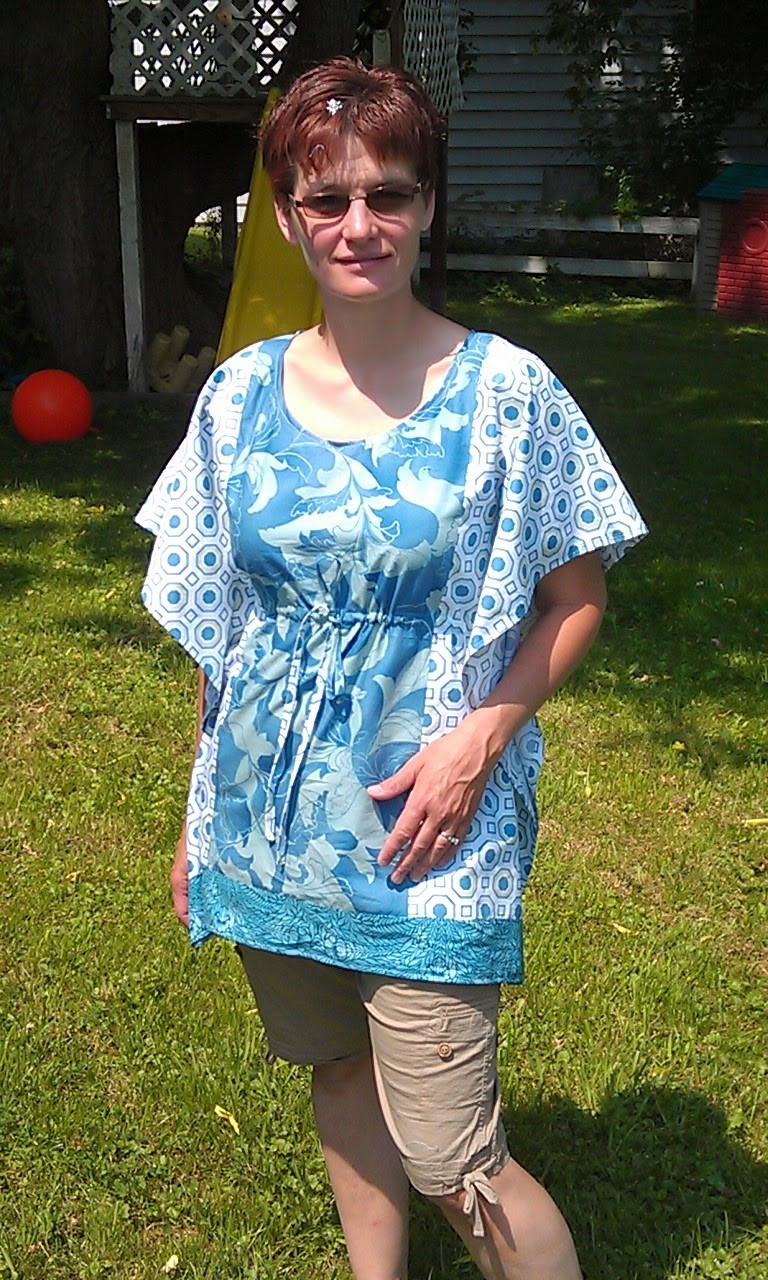
I followed the pattern that I received from O’Susannah’s Quilts and Gifts http://www.osusannahsquiltshop.com/ and it came out perfectly!! I made the large size ( I usually wear a medium but I was blessed with a bit extra up top so I went for the large and it fits snugly over the girls),
HERE ARE THE DIRECTIONS……
Square Tunic
This is a one size/all tunic which can be made smaller or larger by cutting the fabrics narrower or wider. The pattern is written for large size (I usually wear a medium and this large fits me perfectly), with small size in parenthesis. Use a 1/4″ seam allowance.
(NOTE FROM MANDY- I used french seams when I made the second version of this tunic so my inside seams were all finished and it didn’t ravel, to adjust for this I cut my pieces about a 1/2″ bigger than the original pattern called for.) 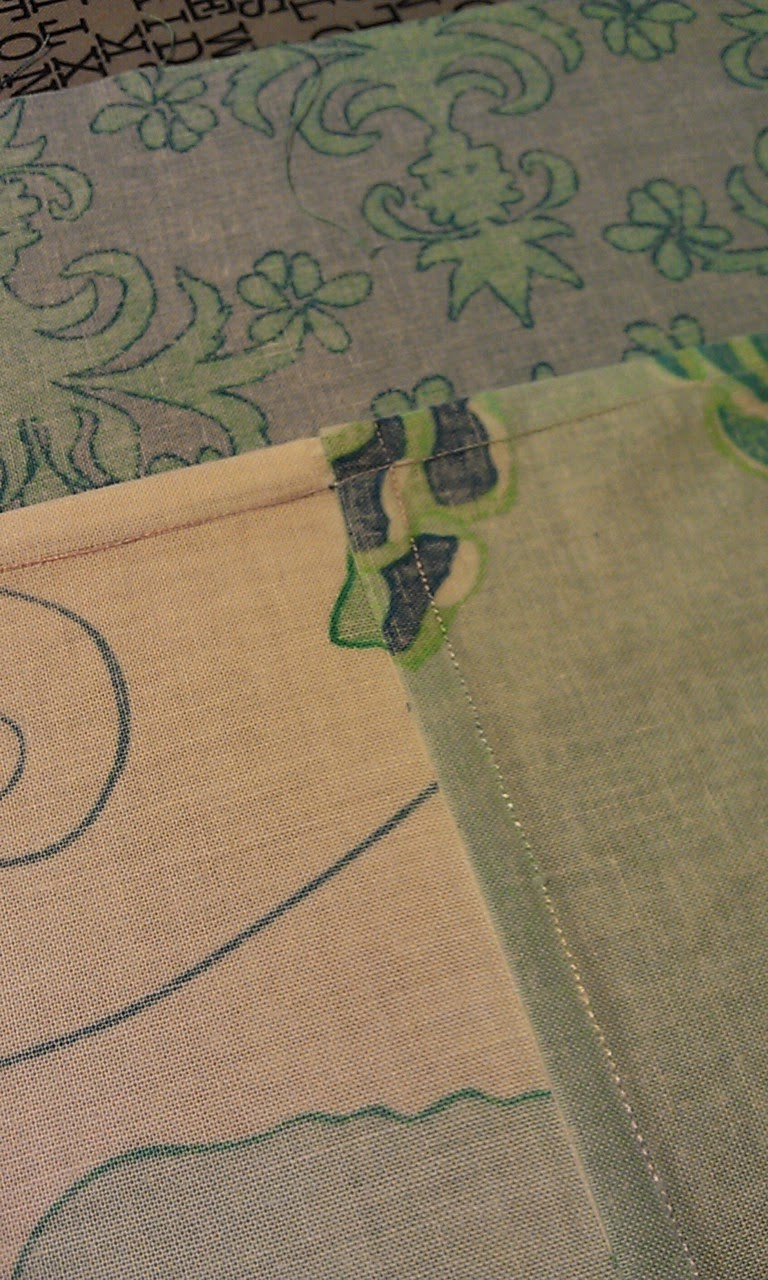
| french seams make it so neat and tidy inside! |
Fabric requirements
THis Tunic is made from 6 panels. Five of the panels are cut from 2 different fabrics, the 6th one is made by sewing pieces of both fabrics together. If yo do not want to use a pieced panel you will need to purchase and extra 1/4 yard of fabric B.
Fabric A 3/4 yards Center front & back panels
Fabric B 1 1/4 yards 3 panels plus pieces for panel 4
Fabric C 1/4 yard Bottom band
Cutting
Fabric A Cut 2 12 1/2″ (10 1/2″) x 30 1/2″ strips
Fabric B Cut 3 12 1/2″ (10 1/2″) x 30 1/2″ strips
Fabric C Cut 2 3 1/2″ x WOF strips
Sewing instructions
1. Make the 6th panel: from the fabric pieces cut off of fabric A & B to make the 30 1/2″ strip, create a panel that measures 12 1/2″ (10 1/2″) x 30 1/2″. This panel will be striped. This adds a little fun to the tunic and saves fabric.
2. Make a front and a back: Sew 3 panels together lengthwise A-B-A. Repeat. Press the seams open. ( I used french seams so I didn’t have to press seams open) Add fabric C to the bottom edge of each panel. Each piece will measure approximately 36 1/2″ (30 1/2″) x 33 1/2″. Set aside.
3. Make a casing for the drawstring: Cut 2 strips 1 1/2″ x 18 1/2″ (16 1/2″) from the leftover fabric pieces. They may have to be pieced together to get the correct length). Turn the raw edges over a 1/4″ and press/ On the wrong side of the front and back panels, measure down 15. Center and pin the casing in place. Top stitch in place. This placement can be adjusted to be at your waist or just below the bust ( it worked out PERFECTLY for me just as they stated).
- ( I put the panels to my body to check the length at this point and decided to trim about 3 inches off of mine) Sew the shoulder seams together. Leave and 8″ (6′) opening in the center panels. This will be the neck line. Your head WILL NOT fit through this opening.
5. Create the V-neckline. Fold the top in half lengthwise down the center panels. Line up the seams. Measure down the fold approximately 6″ and mark. Measure in 2″ from the front seams on BOTH sides of the front panel and mark. Draw a line between the two marks. Cut 1/2″ larger away from the line. Cut the back neckline on a slight curve. Check to make sure the neckline is where you want it. ( I had to make the neckline a bit deeper on mine at this point).
| sewing in the neckline…. tricky on the curve but a beginner can do it! |
6.Roll hem the neckline and all 4 sides of the tunic. Press raw edge over 1/4″ and then a second time and top stitch.
7. Make the sleeve openings: WRONG SIDES together, lay out the tunic flat on your work surface with the front panel facing up. Measure down from the shoulder seam 10″ and mark. Measure UP from the bottom 10″ and mark. Sew a straight line between these marks, 8″ (6′) ( I needed 7.5″ to have room for the girls) in from the outside edge on each side. Do not measure in so far that you will be sewing over your casing. This creates your arm opening and the body of the tunic. This measurement can be adjusted to fit different body types.
8. Create a draw sting: Cut 1 1/2″ wide pieces of fabric and sew together end to end to measure approximately 72″ (60″). Fold in half lengthwise, find the center and press. Open, fold each side into the center and press. Fold in half and top stitch.
9. Make a small slit in the front panel center over the casing to feed the drawstring through. Hand stitch around the opening to prevent raveling.
Enjoy your tunic with Capri pants, shorts, slacks, as a bathing suit coverup or over leggins, the possibilities are ENDLESS!!!!
PLEASE pop on over to O’Susannah’s Quilts and Gifts Facebook page and thank them for this pattern, they were kind enough to share it…….https://www.facebook.com/osusannahsquiltshop
As a quilter I confess I still don’t feel like I can make garments without moral support from my mom and alcohol however I am getting more brave. I still stand by my statement I ONLY SEW FLAT THINGS…… but maybe, just maybe someday…….
Thank you Miss Maddie Kertay for inviting me to Guest blog with you all today!!
amd THANK YOU MANDY!!!!
